
Christmas Heliconia is a tropical beauty known for its bright, festive bracts and unique appearance, making it a favorite for those looking to add a touch of the exotic to their garden. Native to Central and South America, this plant thrives in warm climates and is relatively easy to grow with the right care. In this guide, we will walk you through how to grow Christmas Heliconia plants, ensuring that your garden is full of vibrant colors year-round.
What is Christmas Heliconia?
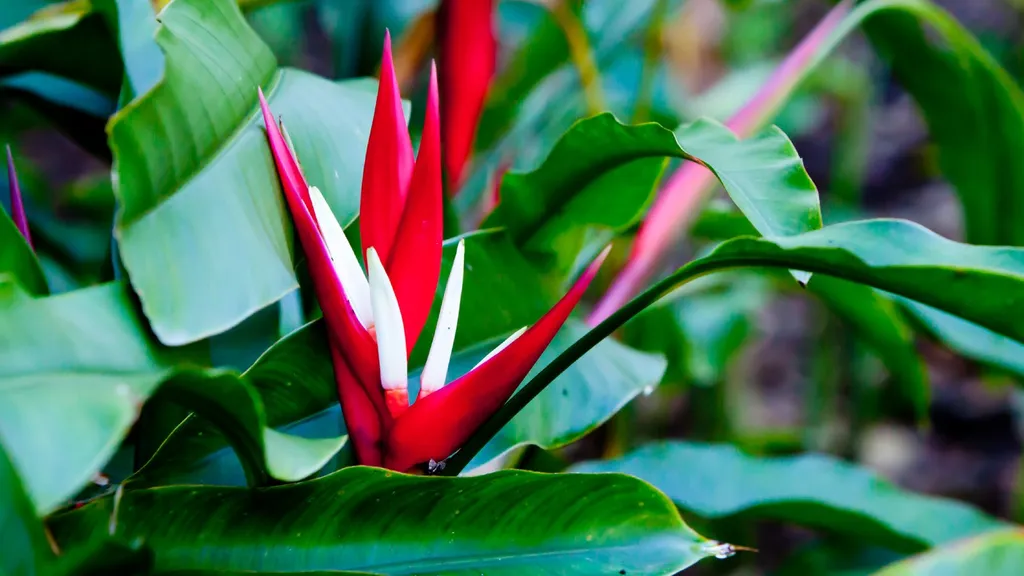
Heliconia, often referred to as the “lobster claw” plant due to the shape of its bracts, is known for its tropical appearance and dramatic flowers. The “Christmas” variety blooms during the holiday season, producing red and green flowers that are reminiscent of festive decor. This makes it a perfect plant for those who want a garden that offers visual interest all year long.
Step-by-Step Guide to Growing Christmas Heliconia
1. Choosing the Right Location
Heliconia thrives in tropical or subtropical climates, so it’s important to choose a location that receives plenty of sunlight. Ideally, they should be placed in an area with full to partial sunlight (6-8 hours of sun per day) and well-draining soil. These plants can also grow in containers, making them suitable for indoor gardening in colder climates.
- Tip: If you live in a cooler climate, consider growing Christmas Heliconia in pots and bringing them indoors during the colder months.
2. Preparing the Soil
Christmas Heliconia plants prefer loamy, well-drained soil that is rich in organic matter. The pH of the soil should ideally be between 5.5 and 6.5 for optimal growth. Before planting, make sure to enrich the soil with compost or organic fertilizer.
- Tip: Avoid heavy clay soils as they can lead to root rot. Adding sand to your soil mix can help improve drainage.
3. Planting Christmas Heliconia
Once you’ve selected your location and prepared the soil, it’s time to plant your Heliconia. Make a hole that’s twice as wide and deep as the root ball of the plant. Place the plant in the hole and cover the roots with soil, ensuring that the base of the stem is level with the ground.
- Spacing: If planting multiple Heliconias, space them at least 3-5 feet apart to give them room to grow.
4. Watering Requirements
Heliconia plants need consistent moisture to thrive, especially during the growing season. Water the plants thoroughly, keeping the soil moist but not soggy. Overwatering can lead to root rot, so be mindful of how much water the plant is receiving.
- Tip: Water early in the morning to avoid fungal growth and diseases that occur in wet, cool conditions.
5. Fertilizing Your Heliconia
For optimal growth, Christmas Heliconia benefits from regular feeding. Use a balanced, slow-release fertilizer every few months, especially during the growing season (spring through summer). Fertilizers rich in nitrogen, phosphorus, and potassium will promote healthy foliage and vibrant blooms.
- Tip: Organic fertilizers like compost and manure work well for Heliconias, adding essential nutrients and improving soil health.
Caring for Christmas Heliconia
1. Pruning
Pruning your Christmas Heliconia helps maintain its shape and encourages new growth. Remove any dead or damaged leaves and spent flowers to keep the plant healthy. Pruning should be done at the base of the plant, close to the soil.
- Tip: Use clean, sharp pruning shears to avoid damaging the plant.
2. Pest and Disease Control
Christmas Heliconias are generally resistant to most pests, but they can occasionally be affected by aphids, spider mites, and mealybugs. Keep an eye out for signs of infestation, such as yellowing leaves or stunted growth. Treat pests with insecticidal soap or neem oil.
- Tip: Ensure good air circulation around the plants to reduce the risk of fungal diseases like leaf spot or powdery mildew.
3. Mulching
Applying a layer of mulch around the base of the plant helps retain soil moisture, suppress weeds, and regulate soil temperature. Organic mulches, like wood chips or straw, are particularly effective for Heliconia.
- Tip: Keep mulch a few inches away from the stem to prevent rot.
4. Winter Care
If you’re growing Heliconia in a colder climate, you may need to bring your plants indoors or provide additional protection. For outdoor plants, consider mulching heavily around the base to protect the roots from frost. Container plants can be moved indoors to a bright, sunny area during the winter months.
- Tip: Reduce watering in winter, as Heliconia enters a dormant phase and requires less moisture.
Propagating Christmas Heliconia
Heliconia plants can be propagated through rhizome division. The best time to propagate is in early spring when the plant is emerging from dormancy.
- Carefully dig up the plant and separate the rhizomes (underground stems).
- Ensure each division has at least one healthy bud.
- Replant the rhizomes in prepared soil and water thoroughly.
Propagation allows you to create new plants that will continue to bloom year after year.
Conclusion
Growing Christmas Heliconia is a rewarding experience that adds a vibrant, tropical flair to any garden. With the right care—adequate sunlight, well-drained soil, and consistent moisture—your Heliconia plants will thrive and produce their stunning, colorful blooms. Whether you’re a seasoned gardener or a beginner, following these steps will ensure your garden is filled with the festive beauty of Christmas Heliconia plants for years to come.